Wednesday, December 29, 2010

Jackson Baby Sign

I feel very blessed. A friend of mine, whom I made a sign for not too long ago, referred her friend to my blog. Her friend then ordered a baby sign for a friend of hers. So appreciative. =)
The sign was made to match the baby's nursery. The baby's bedding is designed in rocket ships and stripes. It is adorable!


This is the nursery bedding that I matched the sign to. The rockets and stripes are so cute!


SOLD!
Custom orders available.

Wednesday, December 22, 2010

Gift Card Envelope

My husband's cousin and his fiancĂ© are getting married New Year's Eve. I checked out their registry and when I went to the store they had almost nothing. I was able to purchase a few of the items and felt I needed to include more. I went with a gift card. 

While I was blog hopping the other day, I came across this neat idea of using a tag as a money holder. I found it at  Studio 490. I won't be using money so I did need to alter the tag to fit the gift card. I thought it was a great idea and definitely what I needed to add a little something extra to their special day. You can check out the blog for instructions. If you have any questions regarding the alterations I made feel free to ask! 

Merry Christmas Everyone!!


Monday, December 13, 2010

Paper Snowflake

My husband's dental school clinic decided to do a snowflake contest. All the snowflakes are hung from the ceiling at the clinic. Naturally he asked me to help him out seeing that he is greatly talented in the paper crafting department. He was a big help....yeah right!! LOL He picked out the colors and that is about it. =) I do hope he wins. 


 The "R" stands for Rembrandt which is the clinic's name.

The Backside

 Merry Christmas!!

Sunday, December 12, 2010

Refurbished Nook Cover

I am the proud owner of a brand new Nookcolor! I love it! I love to read and with living in a tiny apartment I don't have to worry about book storage. It now exists in the electronic form! WooHoo! It has been a while since my last post. I have been busy as I guess life sometimes gets. Anyway, I bought a Nookcolor Cover for protection. However, they didn't have a lot of styles to choose from. I bought the pink one and thought to myself, "I can just design my own." And I did!

Pin It

 The "R" is for my last name in case you were curious. =)

Hand stitched flowers are my fav. If you are interested in how to make the center pink flower, let me know. I'm happy to help. I made it on accident...I love those kinds of accidents. ; )


A little bling...it's a must!

 I still don't understand why some of the pics load sideways. If anyone knows the secret please, please, please let me know. The front of my nook looked almost just like the back does except for the "nook" logo that I blinged.

The Inside. I left it pretty plain because I like to fold it back while I read.

Not for Sale.

Friday, October 22, 2010

Invitation Keepsake

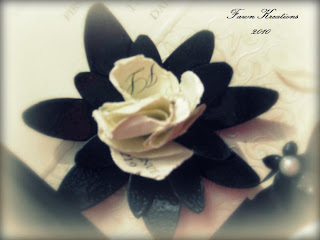
One of my co-workers asked if I could do a keepsake shadow box for a wedding gift. This is what I came up with. I used the reception card for the large white flower and the envelope for the large black flower's center. I really like how it all turned out.


Friday, September 3, 2010

"Visual Memory" Altered Picture Frame

I was inspired to make this birthday gift for my mom's, friend's 50th surprise birthday from Fawn, a friend of mine, over at Always Chasing Life. She posted this adorable altered picture frame she bought for $1.00 at Michael's.

 On the invite it says to bring your favorite memory on a note card. I thought instead of a note card, I would make her something she can hang and admire. There is a picture on one side and then my written memory on the other. My mom's friend is a cancer survivor. She is a strong woman and I wanted to create a visual memory of just how strong she really is! 


You can see here the stamped image coming through the paint.

The is the written memory. She can flip back and forth between the picture and the memory whenever she wants to change it up.

She loves paisleys so, I made a paisley bird! Tweet! Tweet!

This frame not for sale. =)

Thursday, September 2, 2010

Glass Magnets

I saw these types of magnets a while back and have just gotten around to them. I have been scouring through blogs I follow to remember where I saw them but for the life of me, I could not find it. If you posted this let me know so I can give credit where it is due. 

I love refrigerator magnets. Anything to spruce it up and add a little color. The colors in my kitchen are black and white with a splash of teal. These are fairly simple to make too! The short "How To" is at the bottom.


How To:

Purchase the large clear stone beads that you would put into a vase (I got mine at Michael's for $2.50). 
Pick out fabric and/or paper you like. I did a mixture of both paper and fabric. 
Trace the stone on your choice of paper or fabric then cut it out.
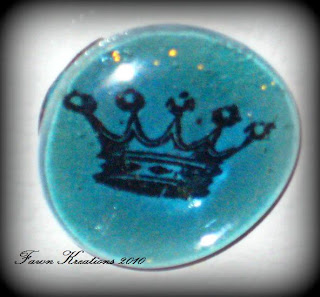
 I added some stamping such as the crown, butterflies, and arrow. 
Then, Mod Podge it to the underside of the stone. Make sure you Mod Podge it facing up!!  
Glue on a magnet and viola! 
A magnet that is stylish and chic! I am a sucker for chic! =)


Custom orders available!

Tuesday, August 31, 2010

Photo Editing for FREE!!

So, I found this FREE photo editing site from Lisa over at re:Inspire. She has a few more editing sites but this is the one I got to first. I am in dire need of anything to help with my photos. I thought since I had the time I would sit down and try to figure this out. I think it is amazing and fairly easy to use! The site is called Picnik. You just create an account for free and get started. Here is the a pic I used to demo. It is from when my hubby and I went to the pumpkin patch last year. I think it turned out not too, too bad for my first.

BEFORE...


AFTER!!!!

WOW! What a difference!! Anyway, I just wanted to pass this little piece of advice on to anyone who is looking for better photos! Have fun!!! 

Sunday, August 29, 2010

"Love Soars" Bookmark

Recently my little brother proposed to his girlfriend!! She asked me for a bookmark in earth tones. I entitled this bookmark "Love Soars" because I am thinking that is the emotion she is feeling. She couldn't be happier! I couldn't be more blessed to finally have a sister!

Here is the finished bookmark from the Mod Podge Matte Resist Technique.

I did a heavy resist on the backside. I think it turned out great!


The "T" is for my soon to be sister-in-law's first initial. 

I used Glossy Accents for the little birdie's crown.
To check out the resist technique used for this bookmark, click here.

SOLD
Custom orders available!

Mod Podge Matte Resist Technique

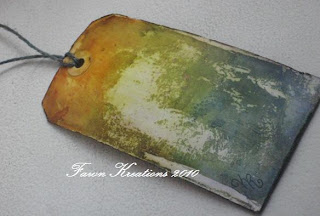
I happened upon this technique by accident while creating my Psalms 55:22 bookmark. Check out the video tutorial and feel free to fast forward in some areas. I didn't realize how slow of an inker I am lol! The finished bookmark will be in the next post. It is called "Love Soars." I hope you enjoy it! Thanks for stopping by! =)


Distress Inks Used:
Chipped Sapphire
Faded Jeans
Stormy Sky
Weathered Wood
Bundled Sage
Shabby Shutters
Peeled Paint
Spiced Marmalade
Rusty Hinge
Walnut Stain (not in video)

Friday, August 27, 2010

Psalms 55:22 Bookmark

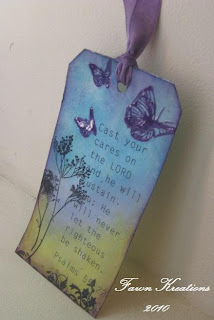
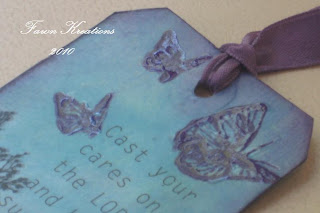
Cast your cares on the LORD and he will sustain you; He will never let the righteous be shaken. Psalm 55:22

I received an order for 4 bookmarks from a good friend of mine for her coworkers. She is a very encouraging and uplifting person. She chose Psalms 55:22 for the message on each bookmark. This bookmark is similar to a previous bookmark I made a while back called "Fly". Only this time I added more purple and the message is different.

The ribbon was initially cream colored. I needed a soft purple so I inked the ribbon. I also added glossy accents to the butterflies and...

to the Psalms 55:22.

I accidentally created a "resist" on the back of the bookmarks. I can't wait to show you how I did it and what I used. Here are some of the pics of the backside of the bookmarks that have the resist.


THE TUTORIAL HAS BEEN POSTED!!!
SOLD
Custom orders available!