This tutorial will be using Picnik.com to make a header for Blogger. It is free to sign up and use. And, it is extremely addicting. =)
(You can also use other websites.)
Here we go!
Step 1: Take a picture of anything that is white.
Load picture to you computer and save it where you can find it.
Step 2: Upload your picture to Picnik.com.
It should turn out like the picture below. It is grayish, but that is fine.
Step 3: Click the "CREATE" tab at the top.
Then click "EFFECTS" underneath the tabs.
Find and click "BOOST" on the left sidebar.
Your picture should whiten up.
Repeat the boost until your screen is white like the pic below.
Step 4: Once you are satisfied, find and click "Stickers."
There will be side bar to your left. If you want a background behind your text, you will need to set that up before placing your text otherwise your text will be covered by the background.
I chose this sticker for my background. There is a color tab on the upper right where you can change the color of your stickers and text.
When you click on your sticker, there is a circle at the top of your sticker's box. This will rotate your sticker. You can also change the size of the sticker by using either the color tab where it says "SIZE" or by pulling the sticker from it's corners like you would when cropping.
Step 5: I am now going to choose "TEXT" and place my text over my background.
The color and size can be changed the same way the stickers can. I am using the word "tutorials" which will be used in the "LINK" tutorial later. Place your text where you want it.
You can go back to stickers and create some more if you choose to.
If you would like something to be flipped the opposite way, find the color tab to your right and find "FLIP."
(Color Tab on upper right)
Once you click "FLIP" the sticker should be facing the way you would like.
This is my finished design.
Step 6: When you are finished, find the "SAVE & SHARE" tab.
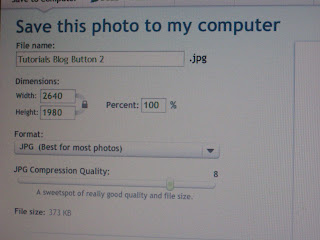
Save it to a place you will remember. I usually save it to the same place, such as desktop, and keep the same name but add a number to it.
Step 7: You will now need to log into your Blogger account. Once you are at your dashboard, find and click "DESIGN."
Step 8: Click "EDIT" under "(HEADER)."
Step 9: You should see this window open. Click "CHOOSE FILE" and find where your picture is. When you find it choose it and it should load to this window. It is possible you may need to resize the pic before loading it here. You can also choose the option "SHRINK TO FIT" at the bottom of this window. You will need to click this before loading your pic.
Step 10: Click the option "INSTEAD OF TITLE AND DESCRIPTION." This will allow only your header to show.
Step 11: Click "SAVE."
Step 12: Click "VIEW BLOG" and check out your new header. If you do need to resize your header, it may take a few times loading it to get it how you want it. Enjoy!
Stay tuned for "How to link my tabs to other pages such as Facebook" Tutorial


Yay Thanks!!!!! :)
ReplyDeleteNo problem! Your header looks great!! =)
ReplyDeleteThank You for this! I have played around with it a little today :)
ReplyDeleteYour welcome Tanya! Have fun playing. =)
ReplyDelete