Sunday, January 30, 2011

Quick Hand Sanitizer & Distress Ink Experiment

I had a crazy thought today. While working with some distress inks, I had planned on using the water technique that Tim Holtz demonstrates here (scroll down just a bit and you will see the water in his hand). However, I glanced across my craft table and noticed some hand sanitizer...Hmmmmmmm...

I will show you pictures of distress inks used with hand sanitizer, hydrogen peroxide, and rubbing alcohol.

The pic below shows the hand sanitizer applied to the paper noted by the black arrows. The last color I used was faded jeans so I thought it was awesome that the hand sanitizer pulled out the blue.
 After applying my heat embosser, the blue spots bleach out to white. If you don't heat emboss, the blue will stay

The second pic shows the reaction of distress inks with hydrogen peroxide noted by the black arrows. You can now see the "bleached out" areas where the hand sanitizer was heated.

The third pic shows the reaction of rubbing alcohol noted by the black arrows. 

This pic shows the reaction of water noted by the blue arrows and the reaction of hand sanitizer noted by the black arrows. What did I use this background for? Check out the next post and you will see. Time to put all of my test tubes, flasks, and beakers away. =)

Thanks for stopping by. Have fun experimenting!

Monday, January 24, 2011

"Saije" Minnie Mouse Cupcake Toppers

NOT AVAILABLE FOR PURCHASE
I made these cupcake toppers for another 1st birthday by request. I can't wait to see the pics from Saije's (pronounced like Sage) party. I hope she had so much fun! I changed them up just a tiny bit from the first ones I made by adding polka dots to the bow on the front side...


...polka dots to the "1"...


...and polka dots to her name!! 


Happy 1st Birthday Saije!!


Friday, January 21, 2011

Monogram Pendant & Charm Necklace with Tutorial

I really wanted a monogram necklace but wasn't sure how to go about it. I found this bracelet on sale at HL and had an idea. I took apart the bracelet and used the circle pieces to hold the monogram. I made one for my Mom, Mother-in-Law and myself. I did them all in our favorite colors and picked out some other charms to add a little vintage style. 
(Tutorial below)
Pin It


Not for Sale
Custom orders available!


Monogram Pendant Tutorial

You will Need:
Glue
Clear Embossing Enamel
Embossing Gun
Embossing Ink (I used Versamark)
Necklace
Desired Charms
Circles cut to fit the inside of the pendant
Either ink and ink blenders or colored paper
Monogram (Mine were stamped)
Tweezers


Step 1: If you are not using colored paper then you will need to either leave the paper white or use your favorite color ink. 
Step 2: Stamp or place your monogram in the center of the circle.

Step 3: Next, you will need to cover your circle with embossing ink.

Step 4: Shake clear embossing enamel over the circle until fully covered.

Step 5: Using tweezers, gently and carefully pick up circle and shake to remove excess embossing enamel.

Step 6: Heat emboss until your surface is clear and shiny as in the picture below.

Step 7: Once the circle has cooled, place glue on the inside of your pendant. Align your circle inside the pendant and gently apply light pressure around the edges (Some glue may pool over the edge of your circle. That is no problem, wipe it off as best as you can).

Your pendant should now look like the picture below.

Step 8: Hold your pendant with tweezers and heat the already embossed circle. This will cause the enamel to melt again. 

**WARNING: THE PENDANT MAY BE VERY HOT TO THE TOUCH SO BE CAREFUL NOT TO BURN YOURSELF!!**

Step 9: Quickly apply a layer of embossing enamel over the circle. Again, shake off the excess enamel.

Step 10: Heat emboss until your monogram is clear and the enamel appears smooth. 

Step 11: Repeat steps 9 & 10 until desired thickness of enamel is reached.

If the Monogram begins to rise, you may need to let the monogram cool for a bit before reheating the enamel and applying more.

As you can see in the picture below, there are bubbles of enamel on the sides. Not to worry, when you are done you can scrape the sides with your fingernail and the bubbles will be removed.


Step 12: Once you have scraped the sides to remove the bubbles, heat emboss again to remove any scratches you may have caused on the face of the monogram. 

There may be voids on the sides which can add a little bit of a distressed look. But, if you want a void free surface, continue to apply the enamel.

Step 13: When you have reached the look you want, set it aside for a few minutes to cool before assembling.

Step 14: Assemble pendant onto your necklace and show it off!!!

Enjoy!

Thursday, January 13, 2011

"How to Link to a Page" Tutorial

I had a heck of a time trying to get "tabs" at the top of my page so this was as good as I could get it lol.

If you would like a custom image, follow Steps 1-6 of  "How to make your own Header for Blogger on Picnik.com". Otherwise, you can find a photo or clip art if you would like. 

Secondly, if you have not already made "Pages," you will need to do so. 

Step 1: Start off by going to "DESIGN" and then click the "POSTING" tab at the top. 

Step 2: Click "EDIT PAGES" and create new pages such as "About me," "Home," etc...Next, click "EDIT" under whichever page you would like to add an image. 

Step 3: Find and click the picture icon like in the pic below. Find and choose your desired pic.

Step 4: Once it uploads, click "ADD SELECTED."

It should now appear in your text space.

Step 5: Before continuing, you need to go to the web page you want to link to and copy the URL.

Step 6: Highlight your image and click "LINK" like in the pic below.

Step 7: You will now paste the URL into the bar underneath "To what URL should this link go?" 

Step 8: Click "OK."

Step 9: Click "PUBLISH PAGE."

Step 10: Go to "VIEW BLOG." The tab or page you just created should appear either below your header or to the upper right side of the page. 
Step 11: Click the tab and it should bring you to your image. 

Step 12: Click your image and it will bring you to the desired page you want your viewers to go to.

I hope this can help some of you. Enjoy!

"How to make your own Header for Blogger on Picnik.com" Tutorial

This tutorial will be using Picnik.com to make a header for Blogger. It is free to sign up and use. And, it is extremely addicting. =) 
(You can also use other websites.)
Here we go!

Step 1: Take a picture of anything that is white.
Load picture to you computer and save it where you can find it.

Step 2: Upload your picture to Picnik.com.
It should turn out like the picture below. It is grayish, but that is fine.


Step 3: Click the "CREATE" tab at the top.
Then click "EFFECTS" underneath the tabs.
Find and click "BOOST" on the left sidebar.
Your picture should whiten up.

Repeat the boost until your screen is white like the pic below.

Step 4: Once you are satisfied, find and click "Stickers."
There will be side bar to your left. If you want a background behind your text, you will need to set that up before placing your text otherwise your text will be covered by the background.

I chose this sticker for my background. There is a color tab on the upper right where you can change the color of your stickers and text.

When you click on your sticker, there is a circle at the top of your sticker's box. This will rotate your sticker. You can also change the size of the sticker by using either the color tab where it says "SIZE" or by pulling the sticker from it's corners like you would when cropping.

Step 5: I am now going to choose "TEXT" and place my text over my background.

The color and size can be changed the same way the stickers can. I am using the word "tutorials" which will be used in the "LINK" tutorial later. Place your text where you want it.

You can go back to stickers and create some more if you choose to.

If you would like something to be flipped the opposite way, find the color tab to your right and find "FLIP."

(Color Tab on upper right)

Once you click "FLIP" the sticker should be facing the way you would like.

This is my finished design.

Step 6: When you are finished, find the "SAVE & SHARE" tab.

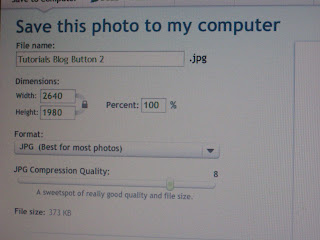
Save it to a place you will remember. I usually save it to the same place, such as desktop, and keep the same name but add a number to it.

Step 7: You will now need to log into your Blogger account. Once you are at your dashboard, find and click "DESIGN."


Step 8: Click "EDIT" under "(HEADER)."

Step 9: You should see this window open. Click "CHOOSE FILE" and find where your picture is. When you find it choose it and it should load to this window. It is possible you may need to resize the pic before loading it here. You can also choose the option "SHRINK TO FIT" at the bottom of this window. You will need to click this before loading your pic.

Step 10: Click the option "INSTEAD OF TITLE AND DESCRIPTION." This will allow only your header to show.

 Step 11: Click "SAVE."

Step 12: Click "VIEW BLOG" and check out your new header. If you do need to resize your header, it may take a few times loading it to get it how you want it. Enjoy!

Stay tuned for "How to link my tabs to other pages such as Facebook" Tutorial